When you're working with multiple files, Aspera integration makes it easy to upload & download entire folders (including sub-folders and files contained).
The Aspera Connect client enables secure and more reliable uploads regardless of file size or user location. In order to be able to upload files and folders to your Ci Workspace, please ensure you have the Aspera Connect client browser plug-in installed and running on your machine.
Note: Aspera Uploads are only available to Personal Network paid users or users of Team Workspaces.
Installing Aspera Connect
Before using Aspera Connect, please visit https://www.ibm.com/aspera/connect/ to download and install the client plugin. Make sure to utilize the settings on your Aspera Connect client to start at startup of your machine to ensure it is running at all times. This will prevent having to remember to start the client plugin.
Uploading a folder to a workspace
-
Ensure the Aspera Connect client is running on your computer. Start Aspera Connect if it is not running.
-
In Ci, use the navigation panel to browse to the workspace and folder where you want to upload a new folder. The folder will be uploaded inside the selected folder. If no target folder selected, the content will get uploaded to the Workspace root level.
- In the top-right corner of the Workspace view, click the "Add New" button, then click the "Upload Folder with Aspera" menu option:
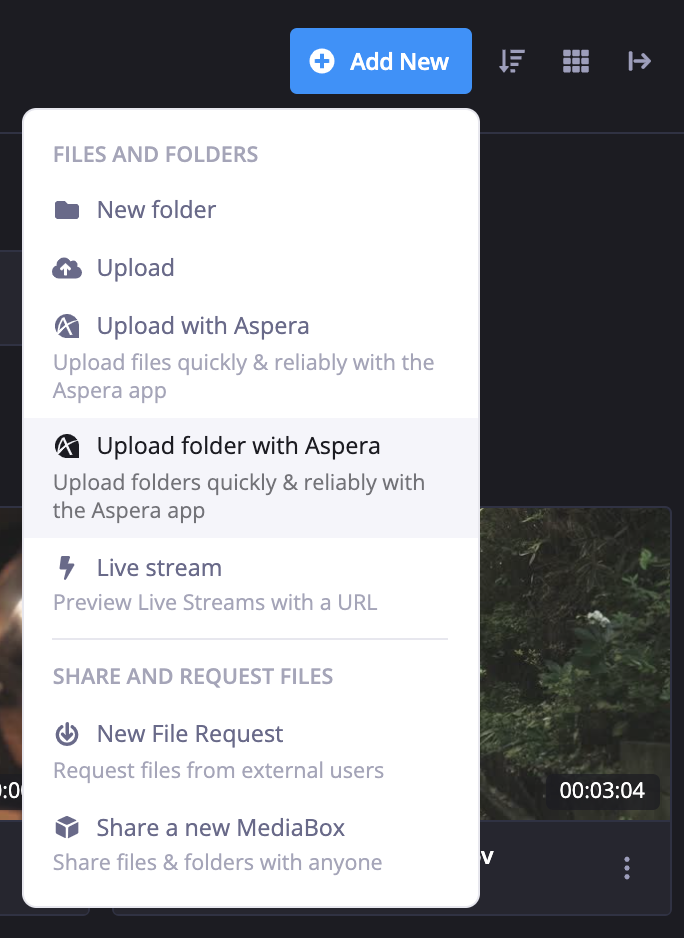
Figure 1: Upload Folder with Aspera menu item
4. In the Select Folder dialog, browse to the local folder you want to upload, select it, and click Open. After the upload starts, the folder's thumbnail image will provide the folder's status and upload progress:
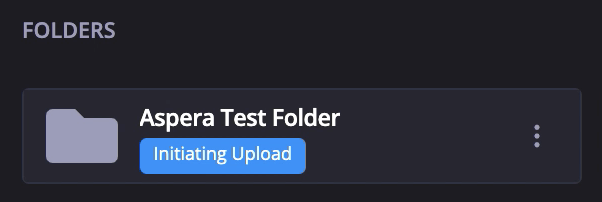


Figure 2: Folder upload lifecycle
Uploading a folder via File Request
Upon receiving a File Request, click Select from this device and select Add folders with Aspera from the dropdown menu:
Figure 3: File Request upload options
NOTE: It is up to the File Request creator to enable folder uploads with Aspera. If disabled, you will not be able to see it among the list of upload options.
Once the folder is selected, the confirmation dialog will pop up:
Figure 4: Folder upload confirmation dialog
Click Contribute Folder to start uploading. The uploading progress will be provided in the same window:
Figure 5: Uploading progress
Alternatively, uploading progress may be tracked in Aspera Connect's Transfer Monitor.
From the Transfers view in Aspera Connect, you can also click into the Network icon to view that specific upload in more detail. The default setting for Aspera transfer speed is 20 Mbps - 100Mbps. To use the maximum available bandwidth for each file transfer (default setting is 3 concurrent transfers) click the heartbeat icon next to the uploading progress bar to open the Transfer Monitor window.
Drag the arrow on the left side of the graph to set the transfer speed (up to the limit of your available bandwidth.
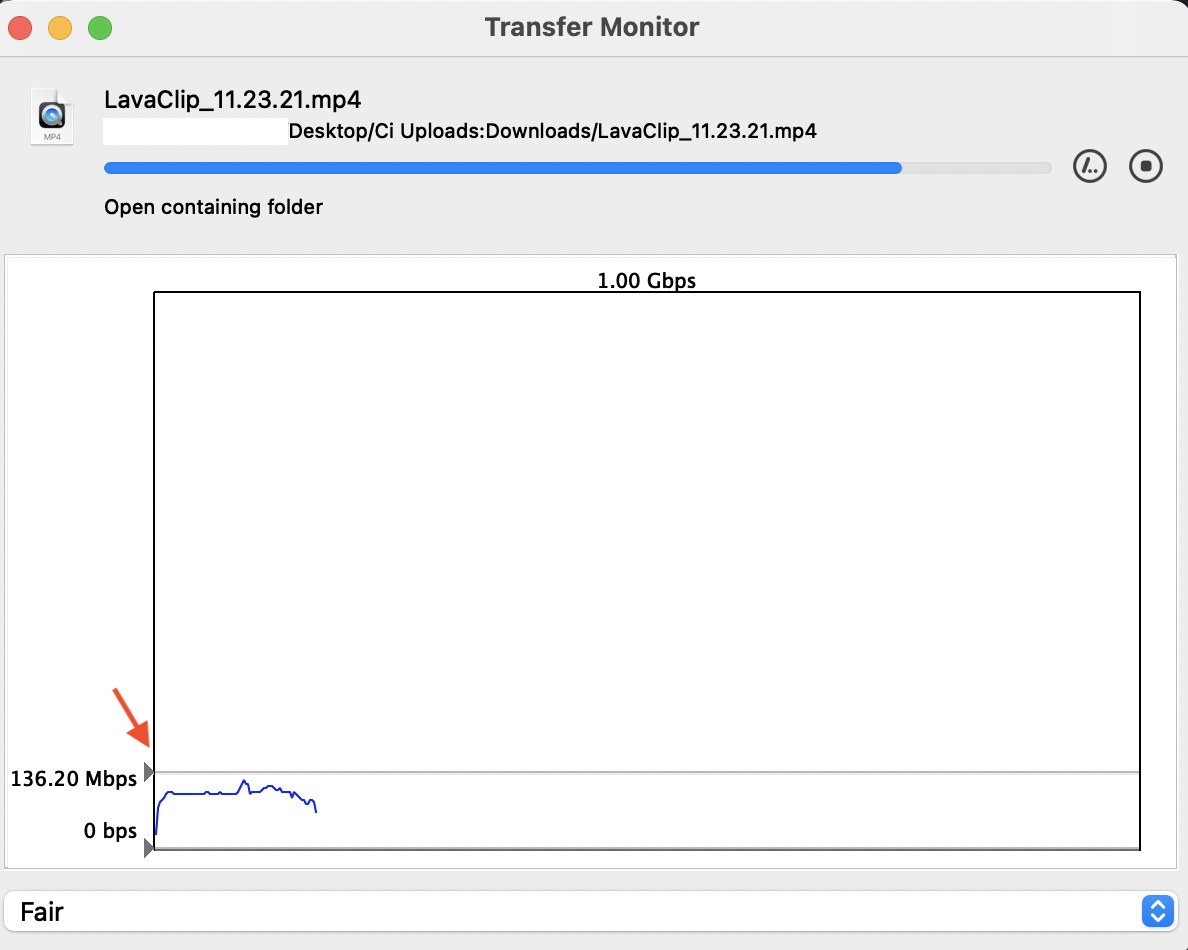
Figure 6: Adjusting transfer speed in Aspera Connect's Transfer Monitor
Downloading a folder from a Workspace
- Ensure the Aspera Connect client is running on your computer. Start Aspera Connect if it is not running.
- In Ci, use the navigation pane to browse to the Workspace and folder you want to download.
-
Click on the folder and either click "Download" -> "Download with Aspera" menu option in the Action Bar...
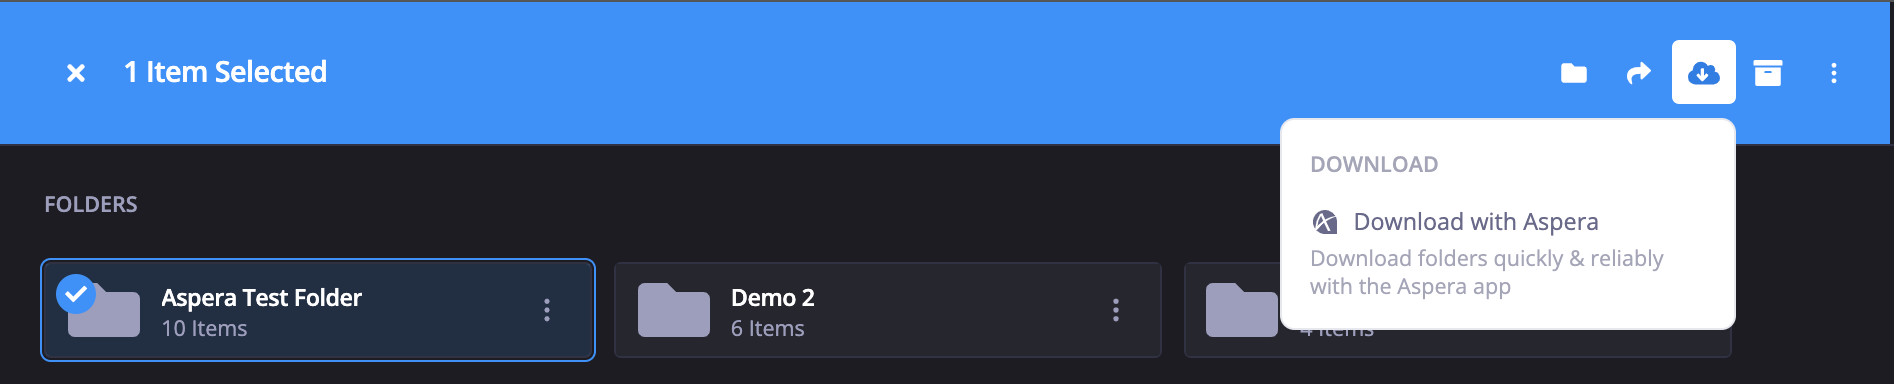
Figure 7: Download Folder with Aspera from the Action Bar
... or right-click on the folder and click "Download" -> "Download with Aspera" menu option in its context menu.
4. The confirmation dialog will provide details about the download, such as the number of subfolders, active and temporarily restored files:
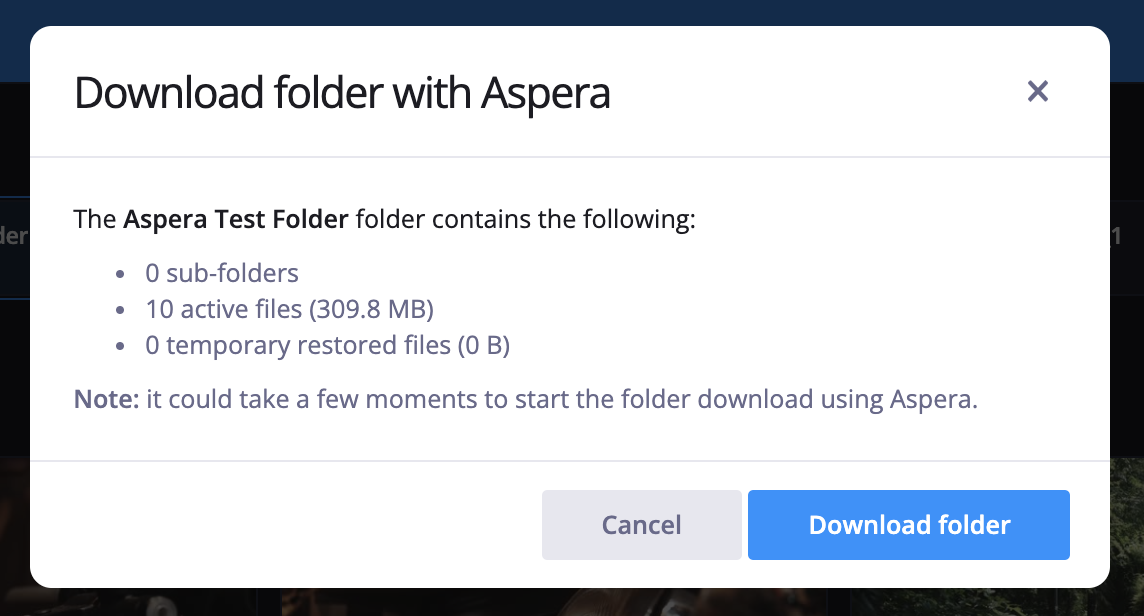
Figure 8: Download Folder with Aspera confirmation dialog
To track the download progress, open Aspera Connect's Activity window:

Figure 9: Folder Download progress
For any additional questions, please reach out to the Ci Customer Success Team by submitting a request here in the Help Center.