Leveraging Folder Share in a MediaBox provides an easy way to share the contents of a Folder and subfolders to any audience. Recipients would not need to be a member of a Team Workspace to have access to folders that are shared. The existing access controls in MediaBoxes can be used to manage who has access to the shared folders. All of that functionality without a great deal of administrative overhead.
When a user shares a folder in a MediaBox, the recipients have visibility to the selected folder's content and subfolder's contents through its folder hierarchy. The following example contains three levels of folders. Sharing Folder_Level_2 shares the contents of that folder and the Folder_Level_3 subfolder in the MediaBox, but the parent — Folder_Level_1 — is not shared.

Figure 1: How Shared Folders look in the Navigation Tree
If files are added or deleted in a shared folder or its subfolders, those changes are automatically reflected in the MediaBox.
How to Share a Folder in a MediaBox
1. In a Space, navigate to the folder to be shared and click the folder to select it.
2. Click Share in the Action Bar, and select Share in new MediaBox
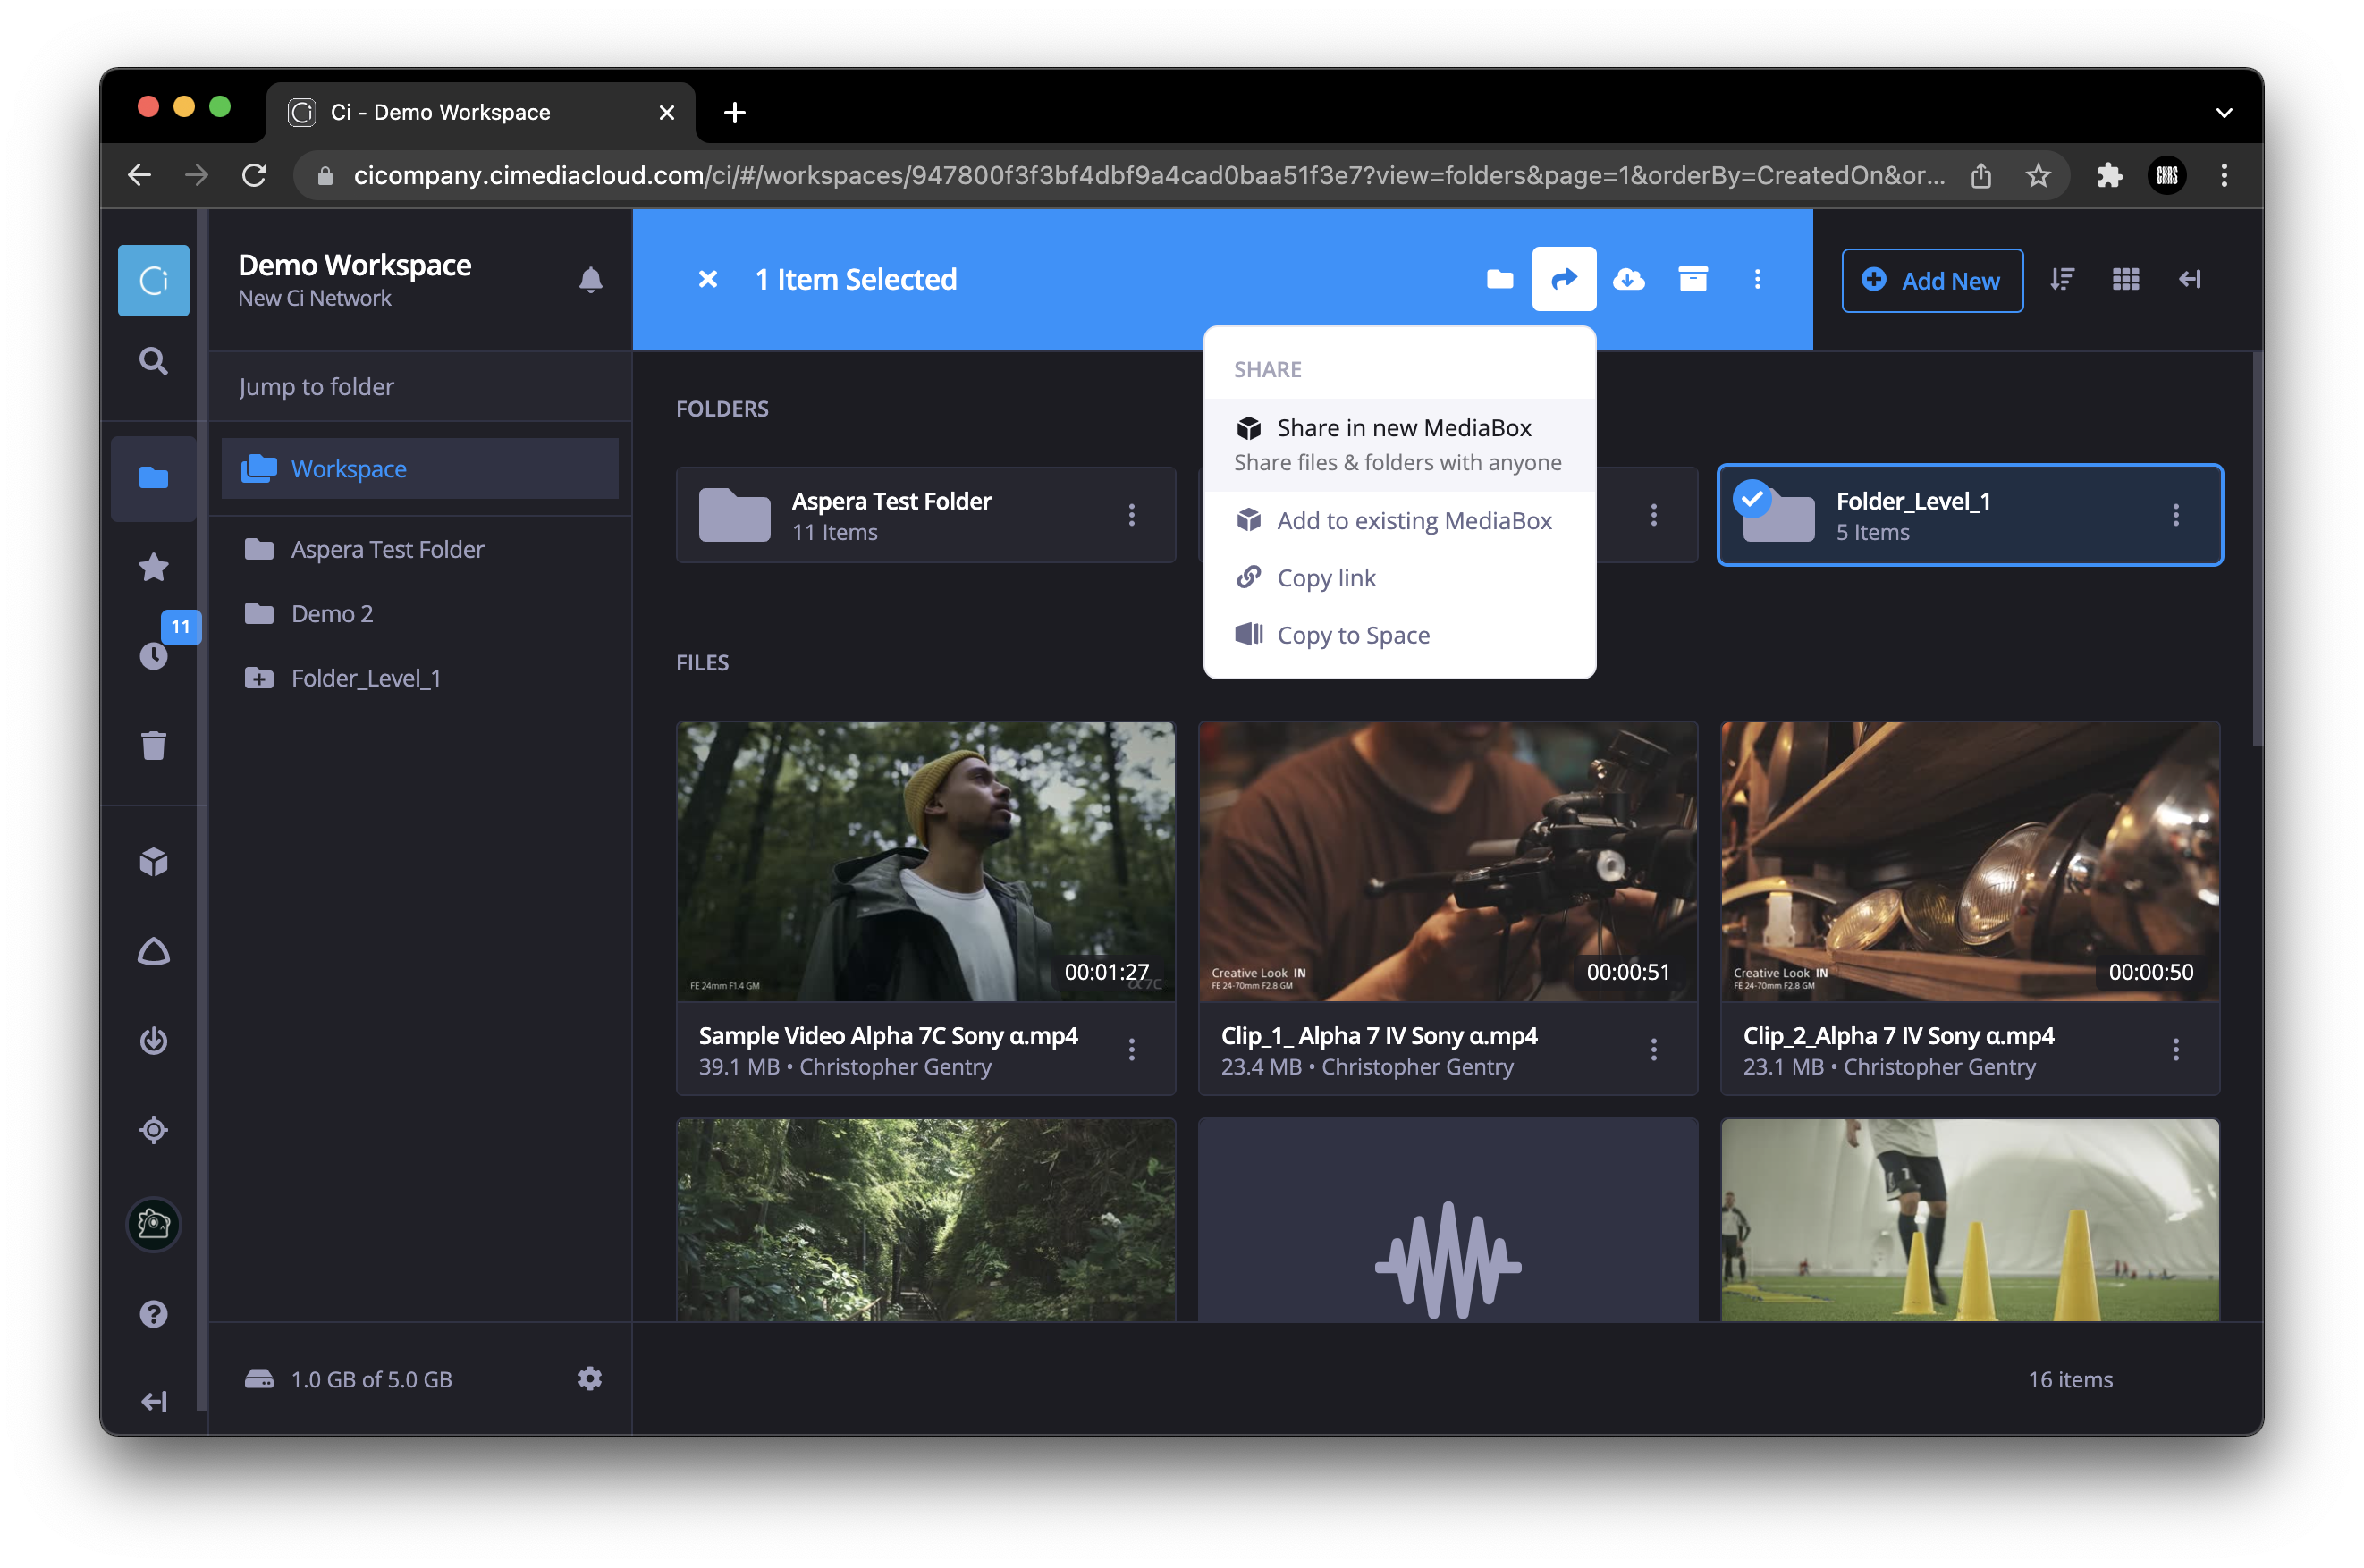
Figure 2: Sharing a folder via MediaBox
 A user can also right-click the selected folder and choose Share > Share in new MediaBox from the shortcut menu.
3. Use the Create MediaBox dialog to choose settings for the MediaBox.
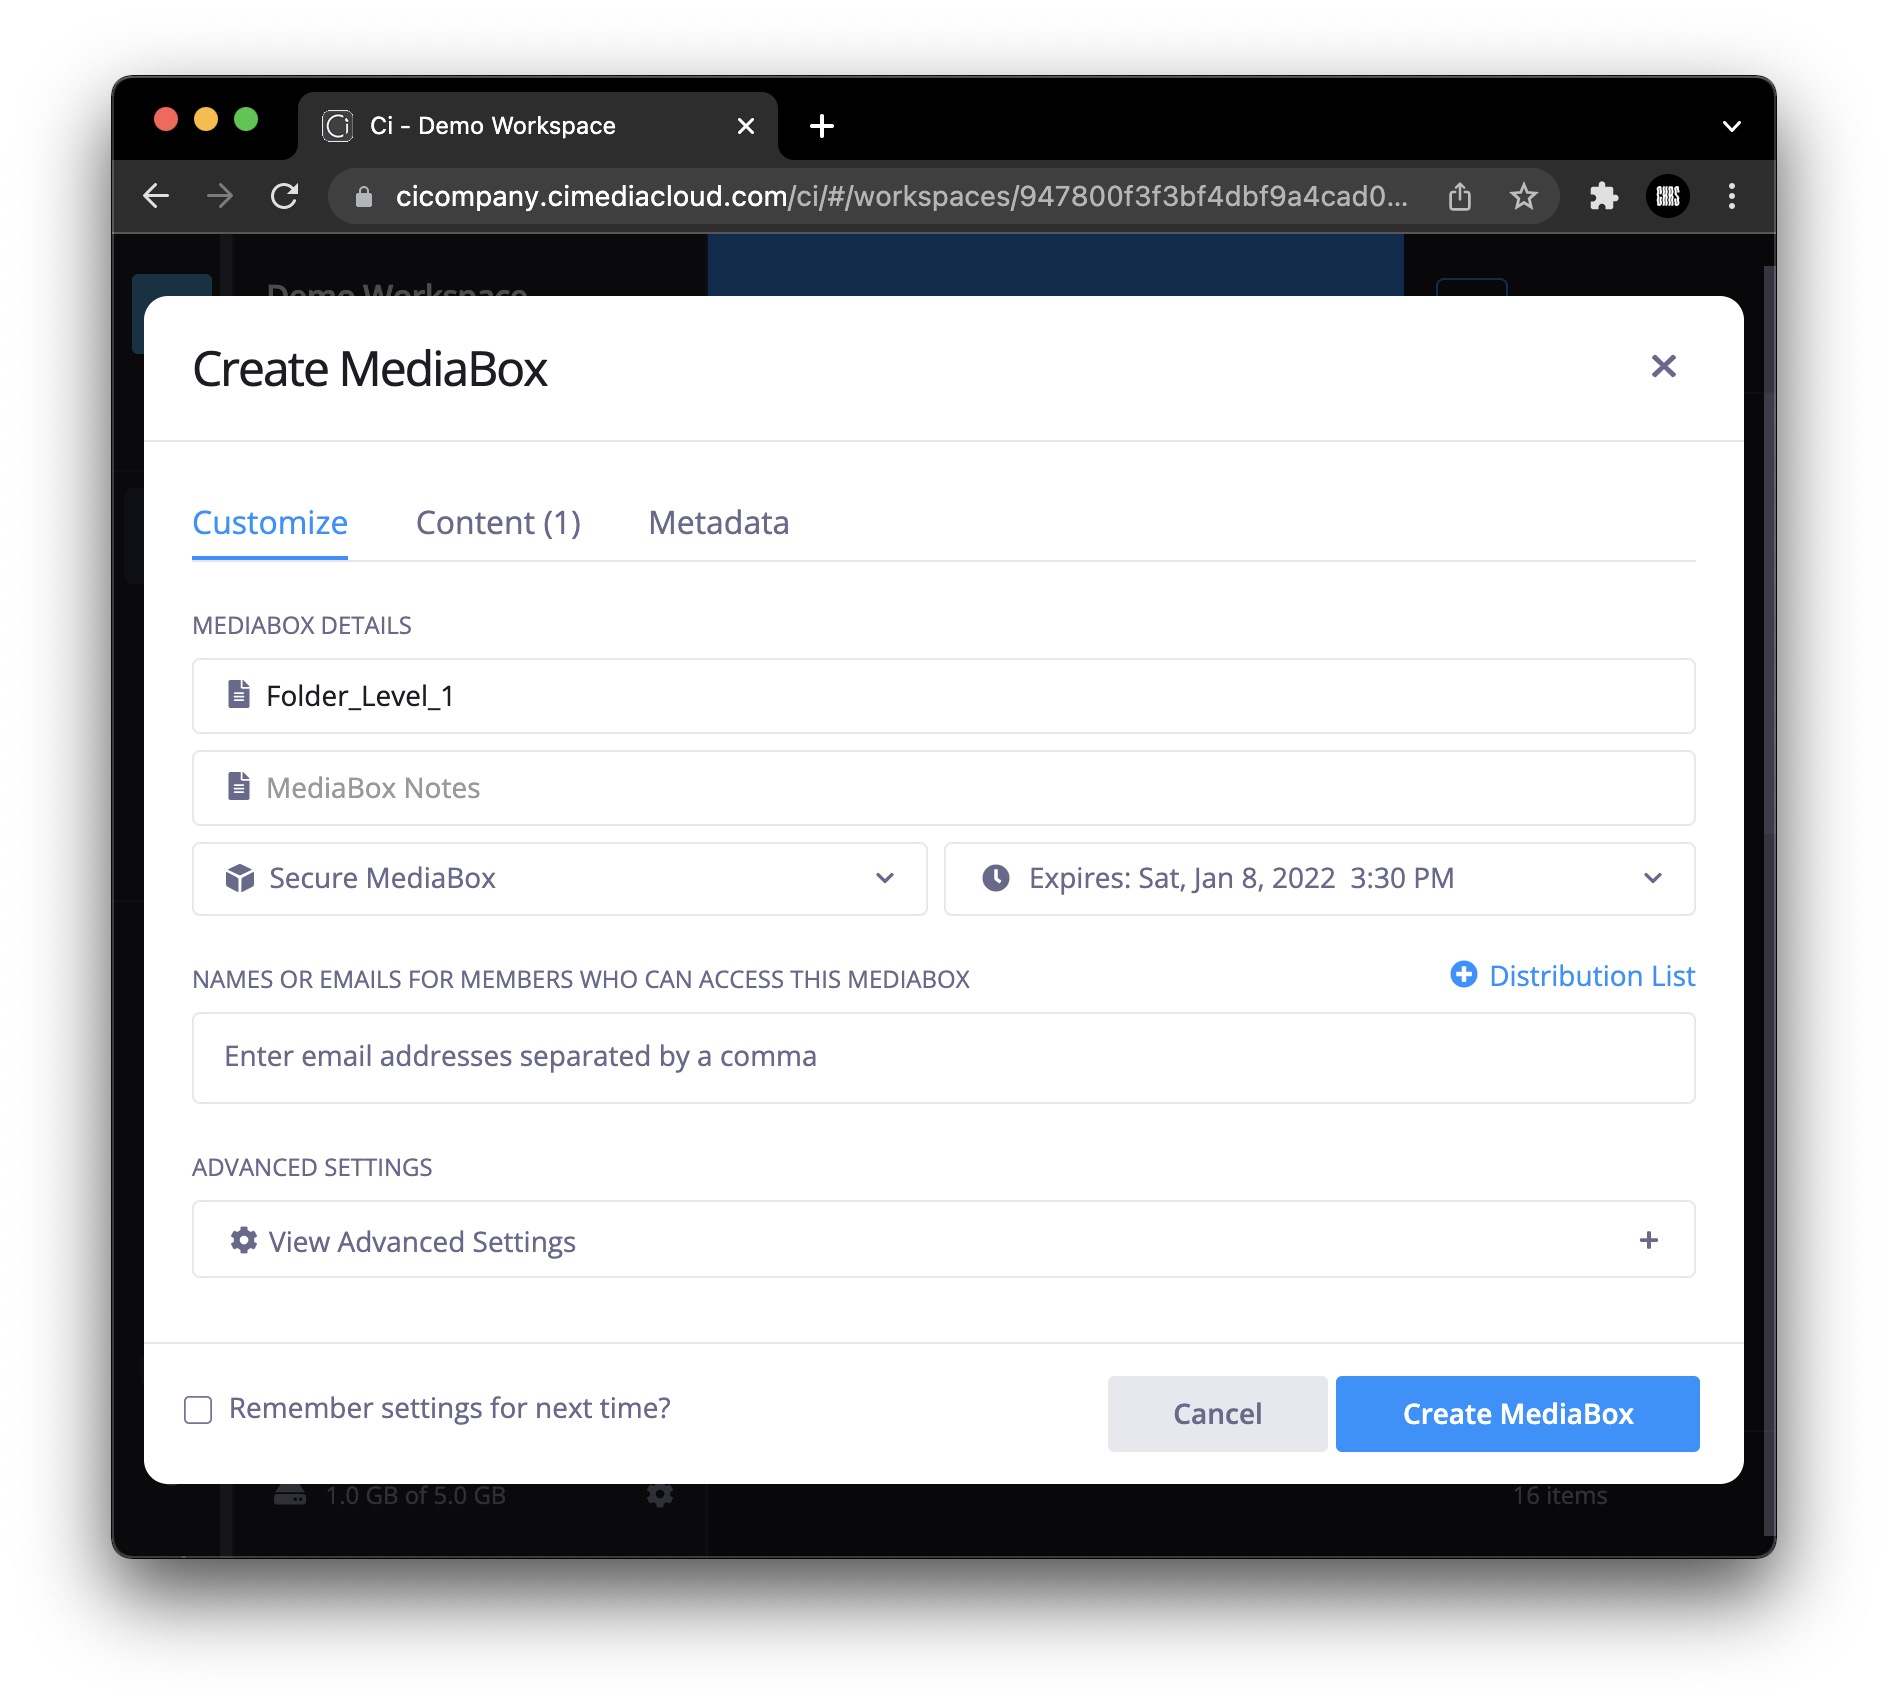
Figure 3: MediaBox settings dialog
- The folder name is used for the MediaBox name by default, but the text can be updated with any name there.
- The user has the option to provide notes to the recipients of the MediaBox. Those notes can be added in the MediaBox Notes box.
- Choose a MediaBox type from the drop-down list:
-
Public: anyone who has the MediaBox link can open it.
-
Protected: anyone with the MediaBox link and password can open it without logging in to Ci. After you choose Protected, type a password in the Password box, or click the Make one for me link to generate a strong password.
-
Secure: only the users you specify can open the MediaBox. Users must log in to Ci. Note: This option also means that the user is specified by email in the list in the MediaBox settings and they must be a registered user of Ci. If they are not a registered user of Ci, then they will be prompted to create an account after which they are provided access to the Secure MediaBox.
-
-
Choose a setting from the Expires drop-down list to indicate when the MediaBox will no longer be available. A new MediaBox will expire after one month by default.
-
Type each recipient's email address separated by a comma. Email addresses are required for Secure MediaBoxes and are optional for Public and Protected MediaBoxes.
-
Next, the user can configure Advanced Settings:
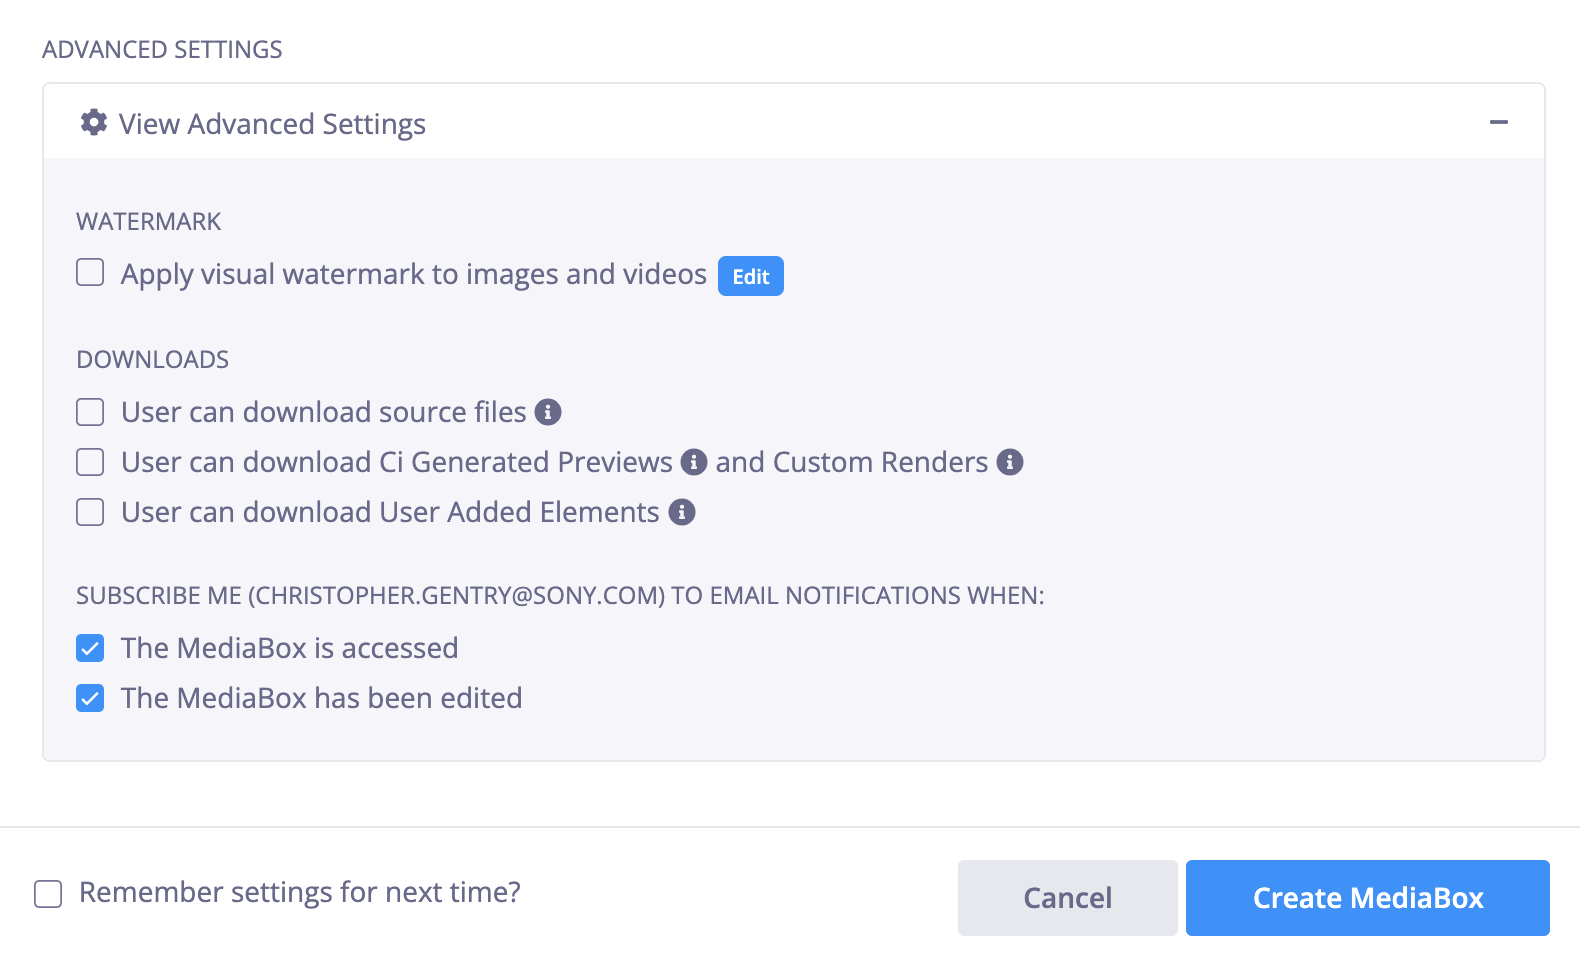
Figure 4: Create MediaBox modal window (Advanced settings)
- Apply a visual watermark to images and videos;
- User can download source files: allows recipients to download the source file(s) (NOTE: Archived files cannot be downloaded);
- User can download Ci Generated Previews and Custom Renders. The user can configure which specific Preview flavor or Custom Render profile should be downloadable;
- User can download User Added Elements (images, video or audio files, etc, associated with the file);
-
Subscribe to email notifications when:
- the MediaBox is accessed: you can opt to have email notifications sent to you when recipient(s) of the MediaBox opens it;
- the MediaBox has been edited.
-
The Content tab shows what you are about to share:

Figure 5: Create a MediaBox modal window (Content tab)
-
It is possible to further edit the content of the MediaBox at time of setup or after the MediaBox is created. Click Add Content to add more files or folders to the MediaBox. There's a setting to Sort files by several options via the drop-down list to choose how the files/folders are sorted in the MediaBox.
It is also possible to edit the order manually by dragging the items in the Content panel to reorder at the top level only, including the top-level sub-folders. Other subfolders in the hierarchy will not be re-ordered.
4. Click Create MediaBox to copy the MediaBox link or send a notification email to the recipients.
Editing a MediaBox with a Shared Folder
When a folder has been shared in a MediaBox, its icon will include a MediaBox icon in the tree view and the main Space panel:
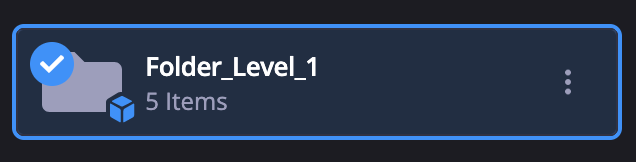
Figure 6: Appearance of a folder shared in a MediaBox
1. The user should select a shared folder to display a Shared in MediaBox link in the upper-right-hand corner of the Workspace panel:
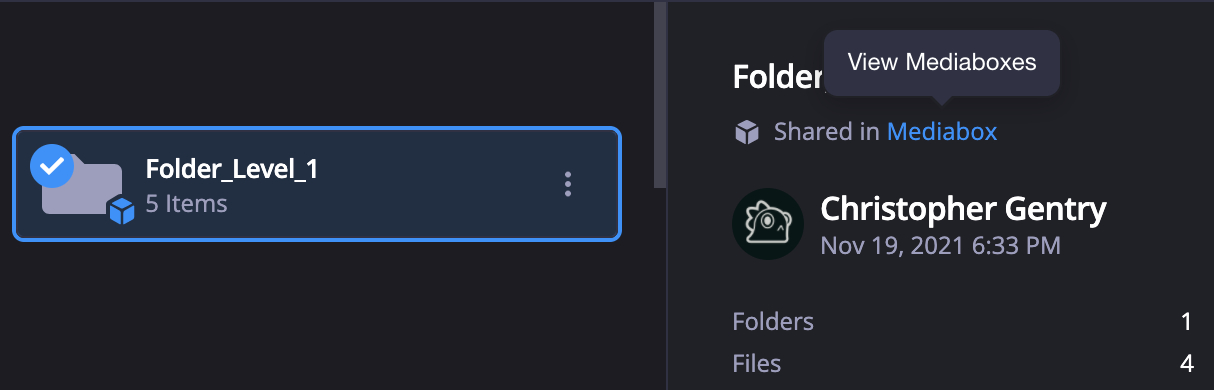
Figure 7: "Shared in MediaBox" link
2. The user then should click the link to see a list of all MediaBoxes that include that folder:
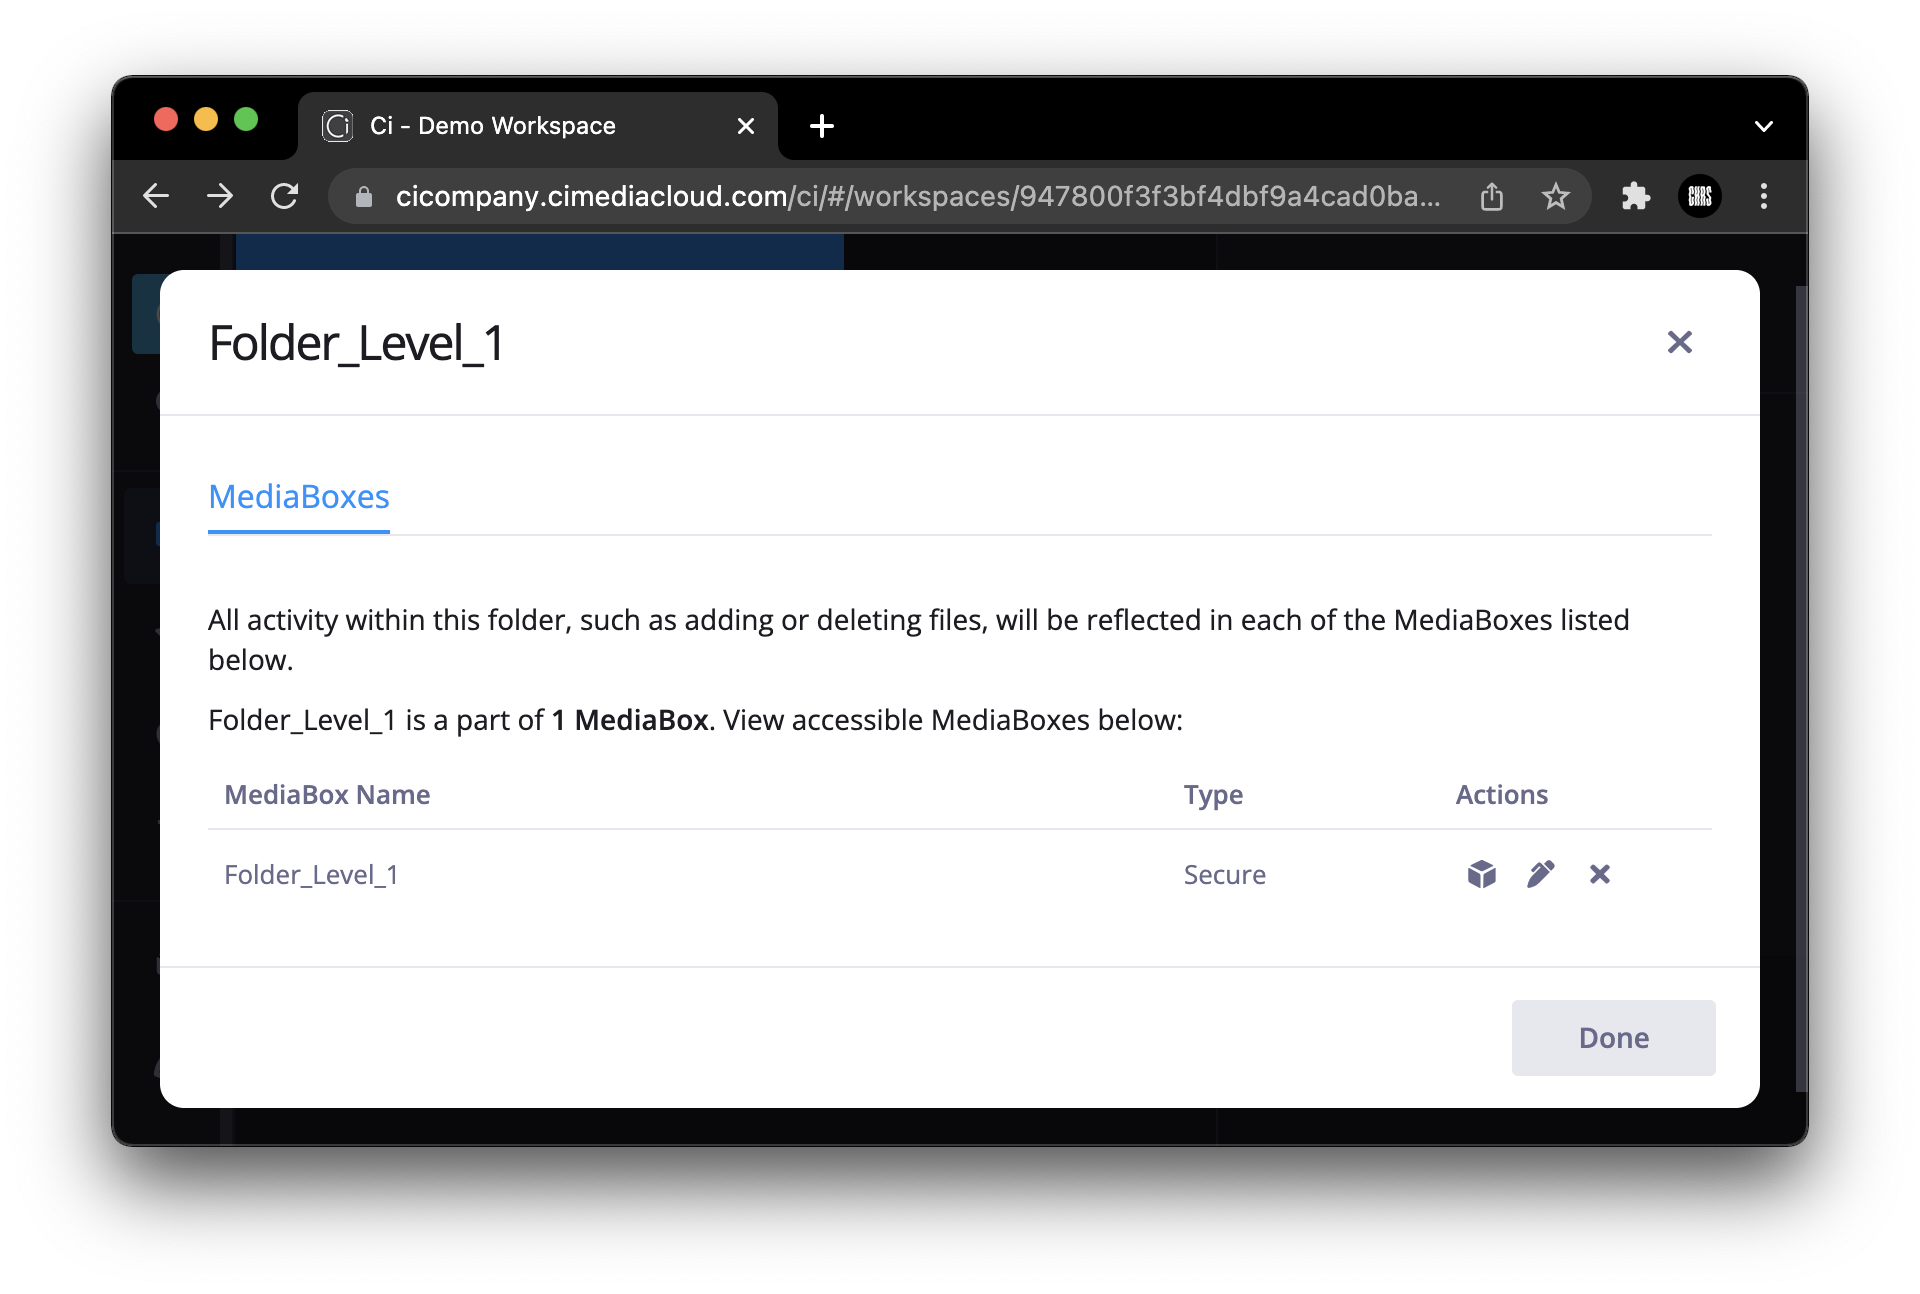
Figure 8: List of MediaBoxes that contain the given folder
The Actions buttons can be used to open each MediaBox, edit it, or remove the folder.
If a MediaBox contains only a single folder, removing the folder will also delete the MediaBox.
If the contents of a shared folder are modified, those changes will automatically be reflected in the MediaBox, but email notifications are not sent. Please notify the users if or when an update to a shared folder is made.
Downloading a Shared Folder
- Once a MediaBox is received, the recipient has to click the link to open it.
-
The recipient then has to click the Download all with Aspera button at the top-right corner of the MediaBox view to download the entire content of the MediaBox:

Figure 9: MediaBox content view w/ Download option
Alternatively, the user may click the Download button on each item to download it separately:
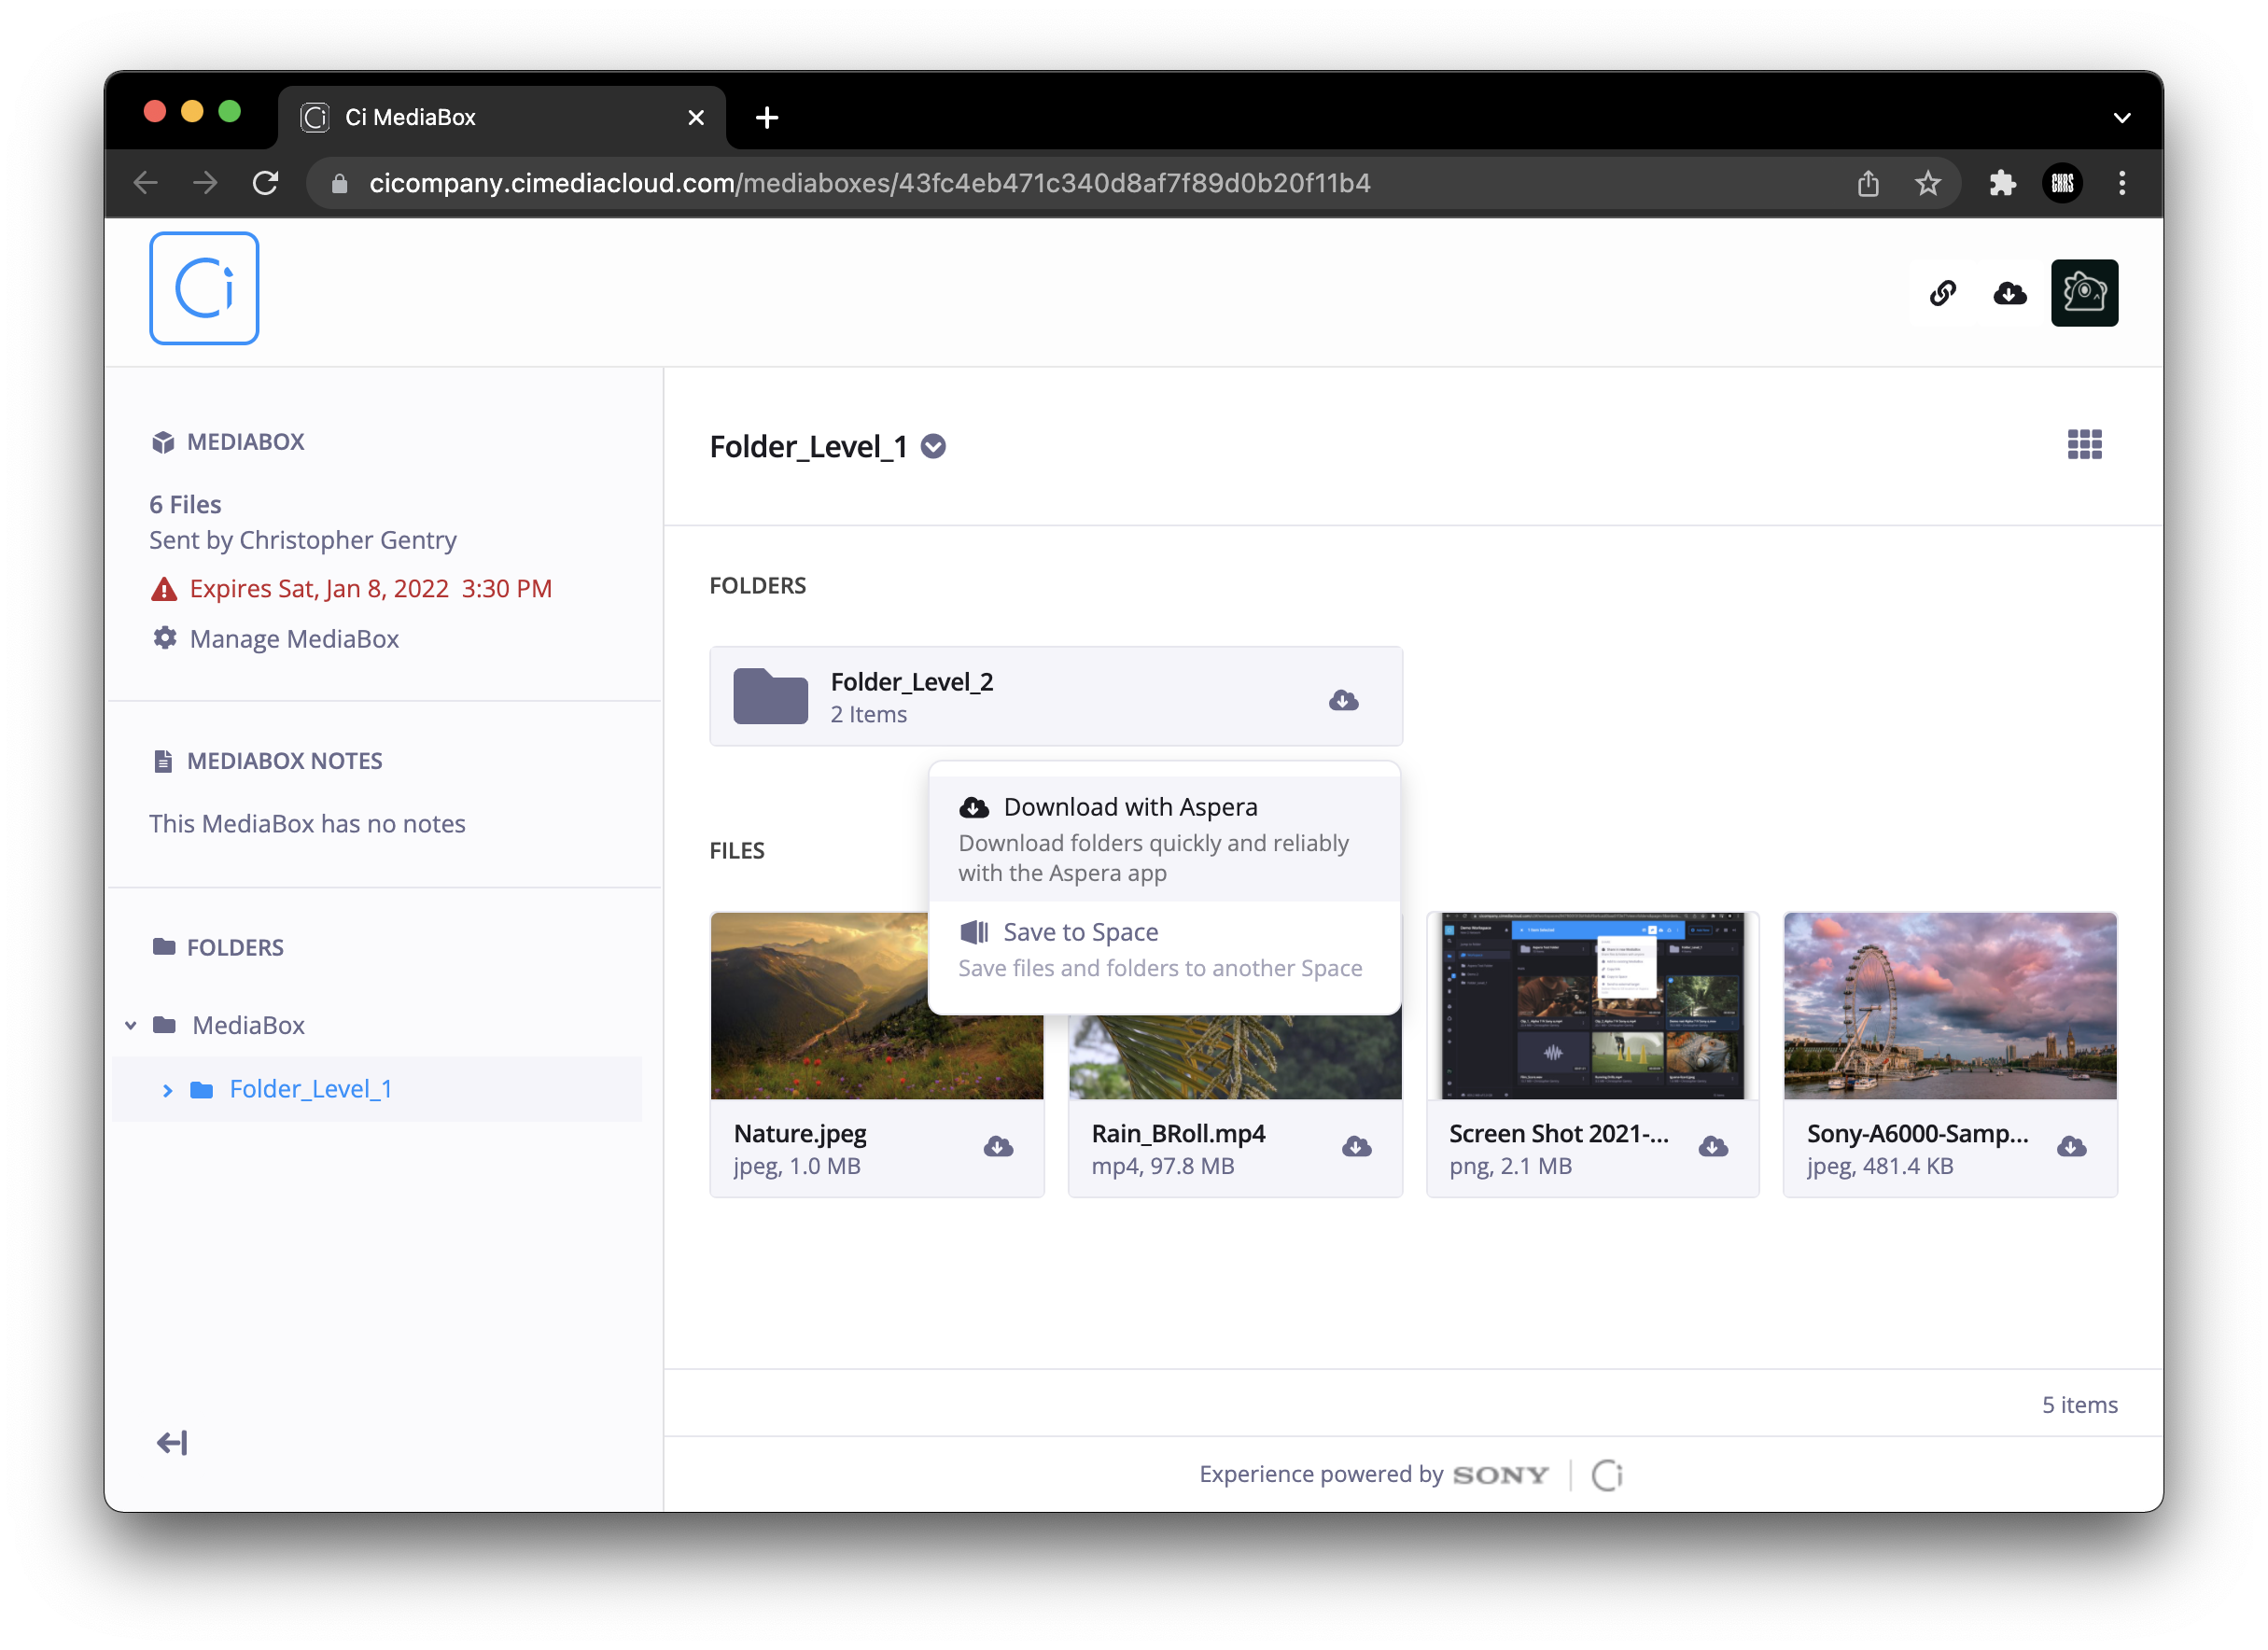
Figure 10: Download a single item
If downloading an entire folder or subfolders, the user will see details regarding the number of folders, files and the total size of the download. This allows a user to determine whether they have enough storage locally or can use other storage as an option to identify for the download location.
For any additional questions regarding how to use the Folder Share in a MediaBox functionality, please contact the Ci Customer Success team by either submitting a ticket or an email.
For any additional questions, please reach out to the Ci Customer Success Team by submitting a request here in the Help Center.