
There are two mechanisms for uploading files to Ci:
— Standard upload;
— Upload with Aspera;
Both were designed and developed to provide the best uploading experience. For both, the upload speed/time will depend on user’s web connection as well as any other applications utilizing a network bandwidth.
There are some distinctions between both mechanisms and below we are providing guidance on how to upload and best practices to help in achieving the results of successfully uploading content to Ci.
Standard Upload Best Practices
The Standard Upload option uses the standard HTTP protocol through a web browser. This means that other browser traffic and other applications utilizing internet connectivity can impact upload speeds through the standard browser-based upload. If an upload is taking longer than expected or if there is a queued set of files behind other files that are uploading, it is always a good idea to run a speed test (speedtest.net) to identify your connection speeds, especially as it would relate to the upload speed.
Please make sure your browser is opened while your files are uploading. We recommend disabling “Energy saving” mode on your computer to prevent the machine from falling into the Sleeping mode (which will cause loss of Internet connection)
The Standard method can be sensitive to the quality of your Internet connection. If you are experiencing any issues with your uploads, please double check your connection parameters. We recommend using speedtest.net for getting details on your current available bandwidth. If you are experiencing as a result of a speed test, upload connections that are less than 1mbps, then consider trying to improve or find an alternative connection with better upload connectivity.
If the connection is lost for a short period of time, such as for seconds, Ci will still try to get your file(s) uploaded once the connection is re-established. However, longer outages, such as minutes to hours, will cause uploads to fail.
If you’re experiencing problems with uploading even though your Internet connection seems to be a sufficient enough upload speed, please reach out to the Ci Customer Success Team by submitting a request here in the Help Center. It would be helpful if you could provide some details of your setup, such as:
— OS version;
— browser version;
— bandwidth parameters (results of running a speed test);
— screenshot of your browser’s error console (How do I open the JavaScript console in different browsers?)
Standard Upload Notes:
— Ci will not upload files of following formats: .bat, .com, .exe, .html, .js, .jsp, .php, .py, .rb, .swf, .vb
— Currently, the Ci Workspaces User Interface allows upload of files. Ci Workspace User Interface does not allow upload of folders & sub-folders with Standard Upload.
Standard Upload: How-To
For a complete reference to using Standard Upload, you can use our User Guide: Standard Upload. Below is a quick reference summary on Standard Upload. To get upload started, either drag-n-drop files into a Workspace (or a specific folder within a Workspace) or click "Add New":
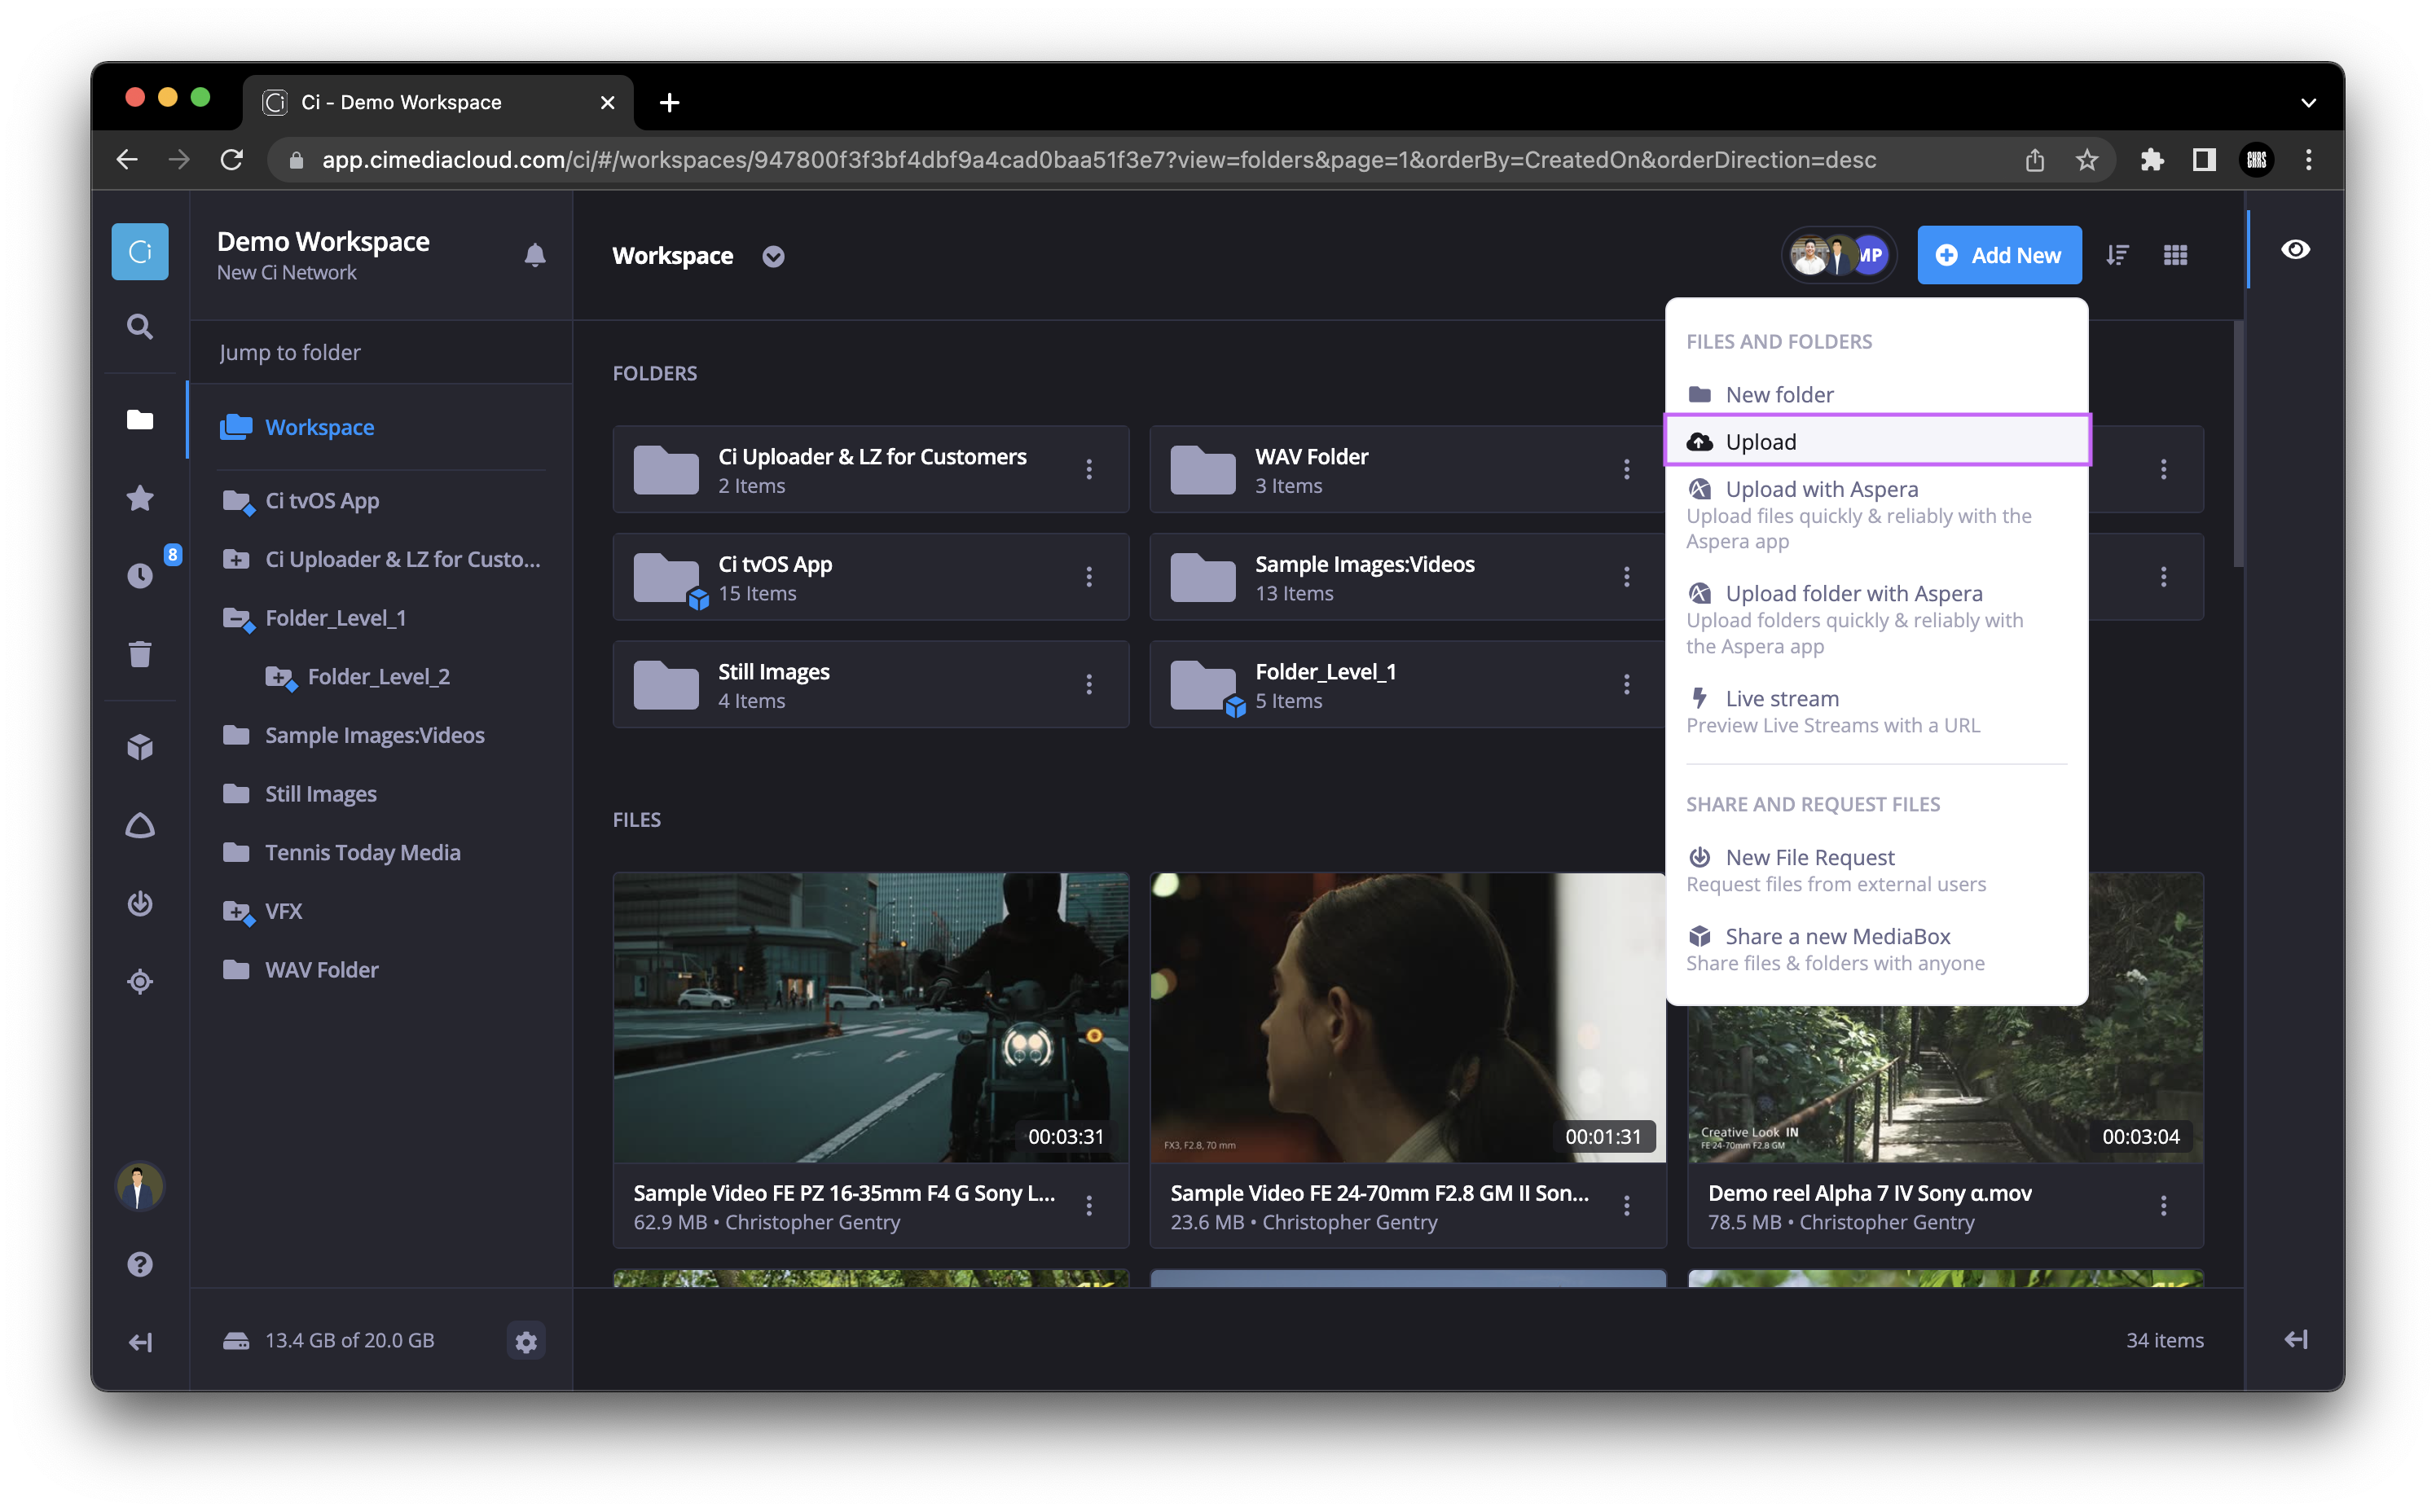
Figure 1: Upload options
Once upload starts, you'll see thumbnails of files that are being uploaded. Thumbnails will provide file's status as well as upload progress (as shown in Figure 2)
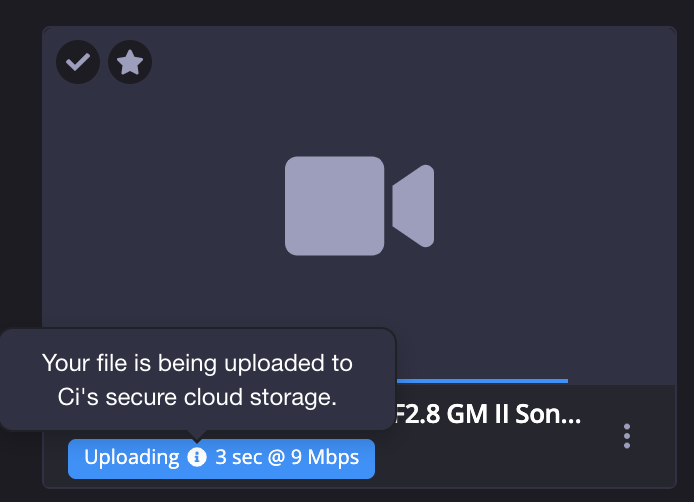
Figure 2: Upload in progress
Standard Upload: Contribution via File Request
For a complete reference on File Request content contribution, visit How To Upload via File Request. To contribute content using the Standard method, just drag-n-drop files to the File Request window or click “+ File Upload” button and select files you want to contribute. Then, click “Contribute Files” button to get your upload started:
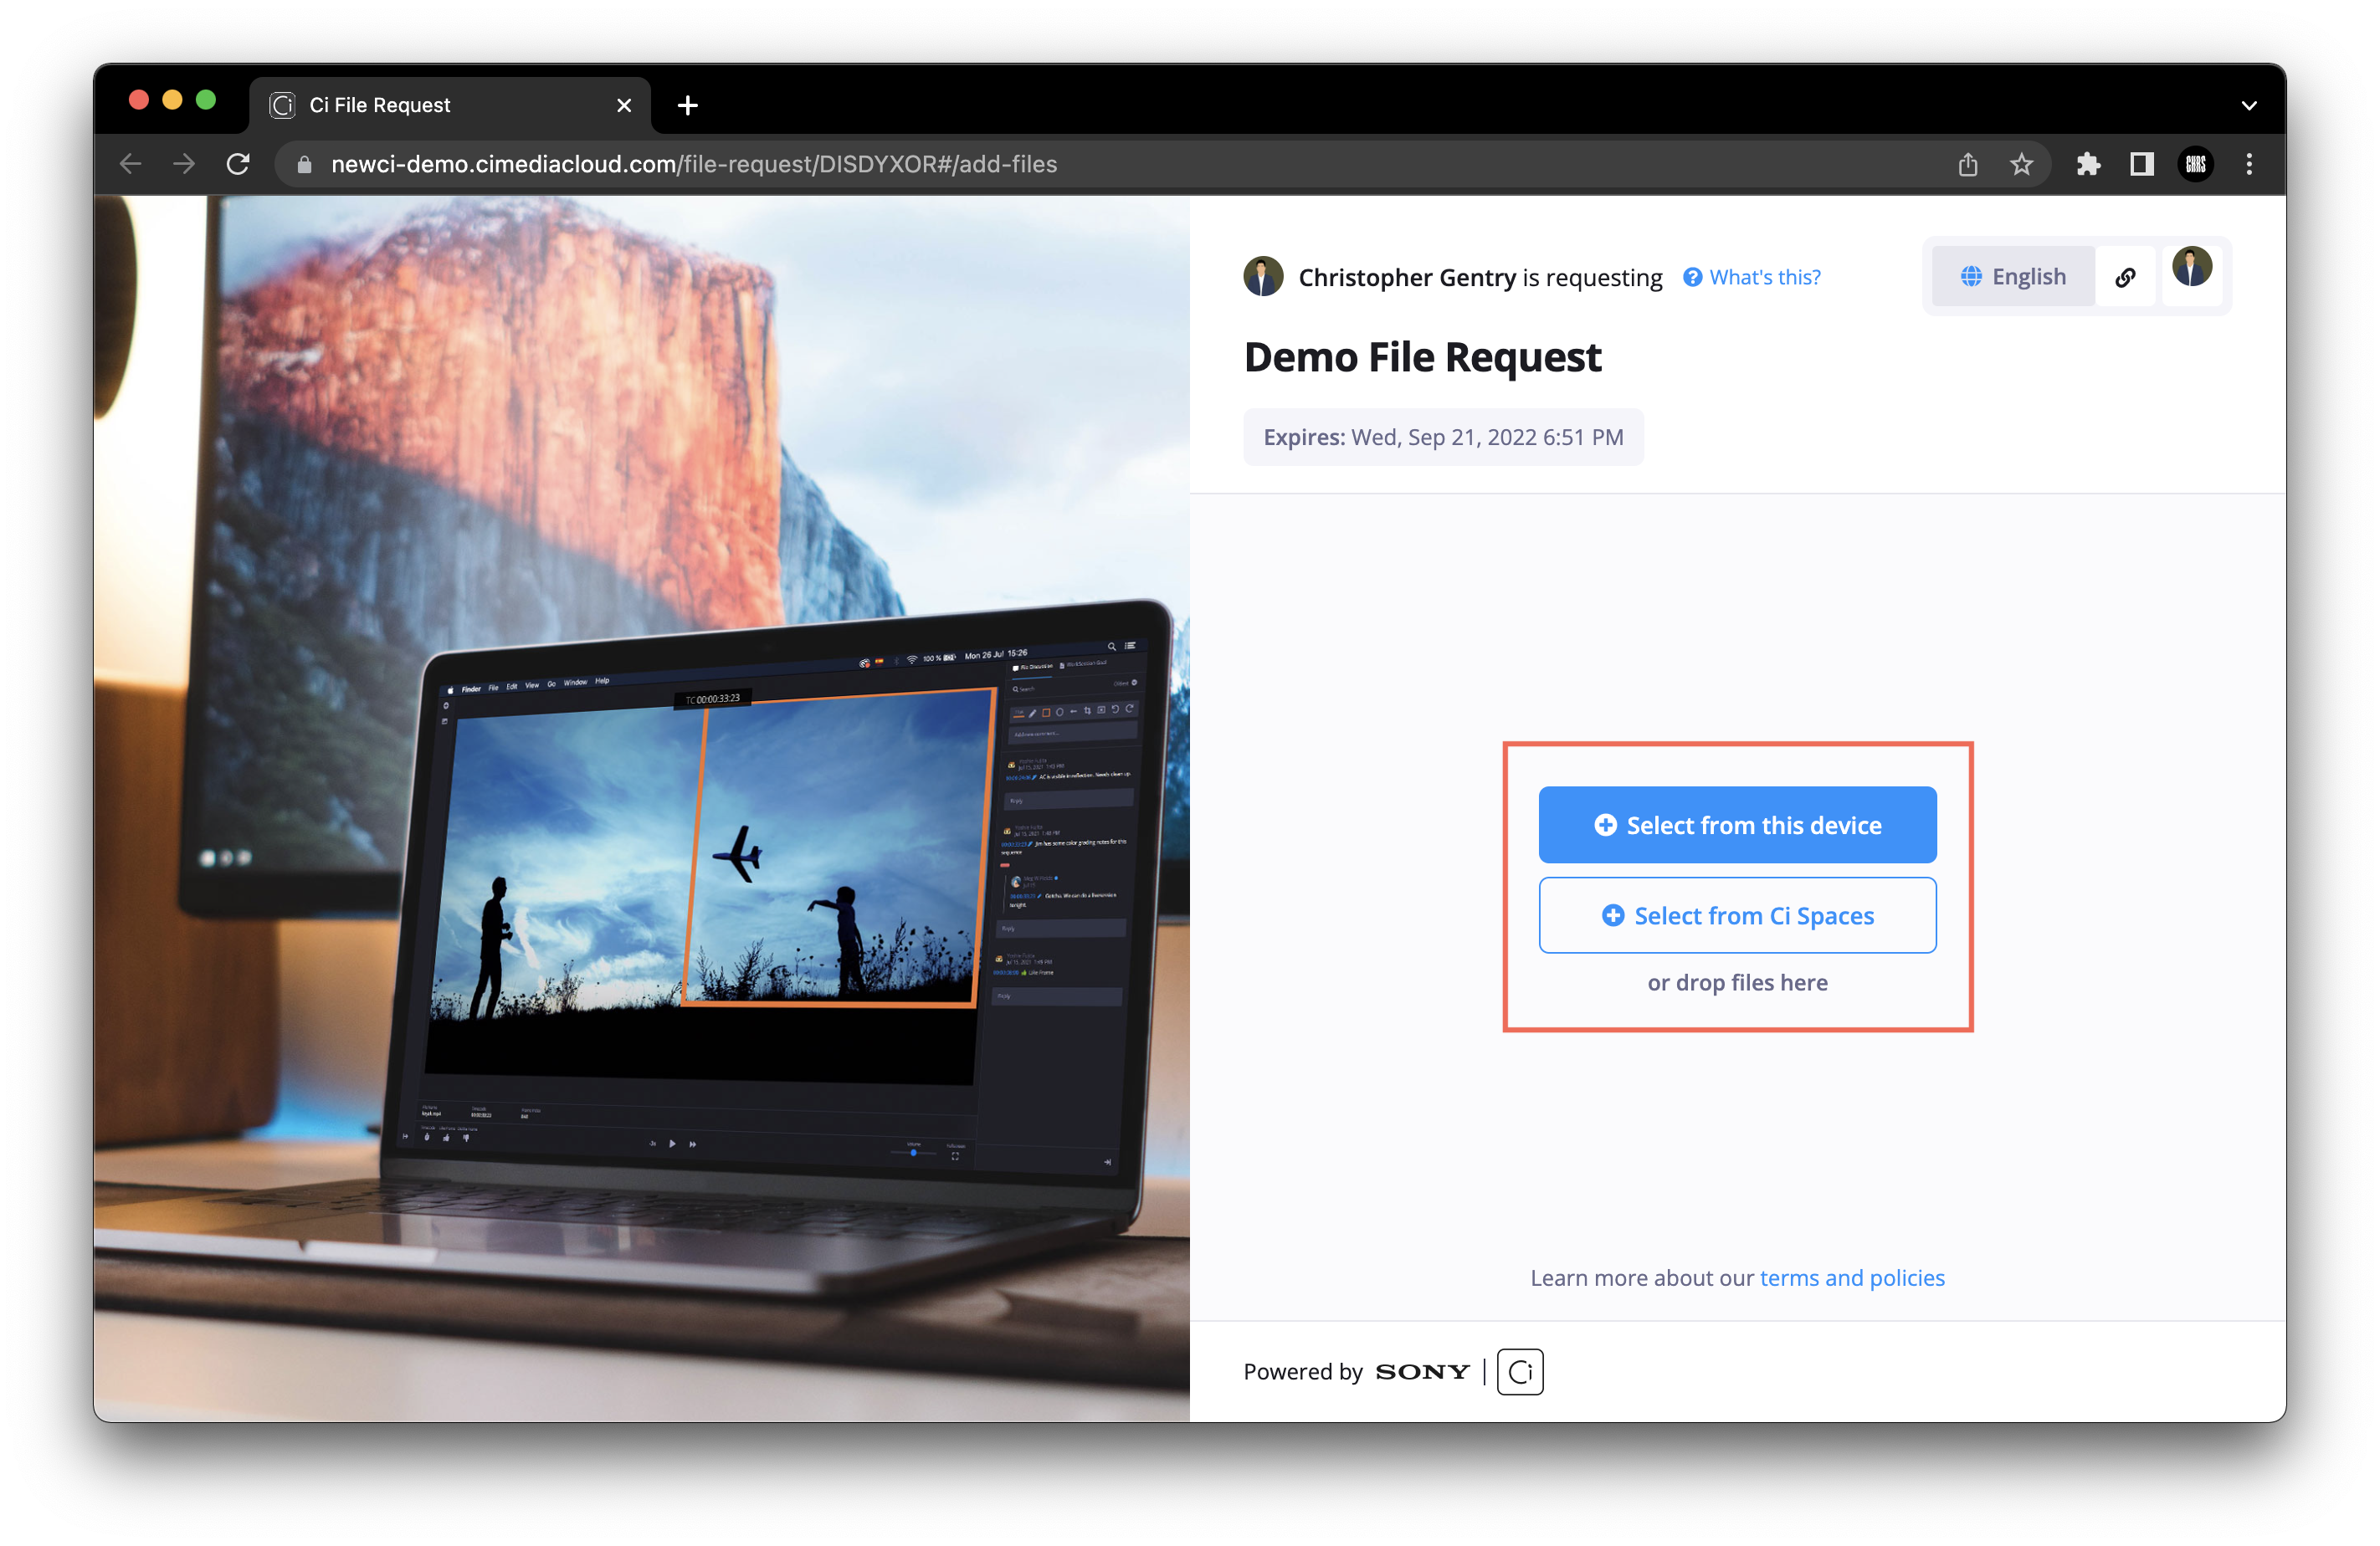
Figure 3: Contribute files to Ci via File Request
Upload with Aspera Best Practices
SONY | Ci integrates with Aspera Connect at the web browser plugin level. There is an install process for downloading and installing Aspera, which we outline in our User Guide: Aspera Upload. For users who have initially installed Aspera, it's important to make sure that Aspera is running. You can right click on the Aspera Connect icon in the Dock(MacOs) or Tray(Windows), and identify that you can set Aspera to always be in the Dock/Tray and that Aspera starts at login. In Windows, you can go to the Tray icon for Aspera Connect, right-click and choose Preferences. In the resulting General Tab, check the box for "Automatically launch Aspera Connect when Windows starts". This will ensure that Aspera Connect is running all of the time and Ci will be able to recognize it is running when attempting to use Aspera Connect.
Aspera offers the ability to upload content as a managed transfer with aspects of file transfer acceleration since it utilizes a different protocol than only HTTP. This allows for increased efficiencies in the transfers and the added ability to manage, meaning resume or pause transfers via the Aspera Connect client. We recommend utilizing this method for contributing big files (1+ GB), since Aspera has the capability to resume transfers, including failed transfers or in the event a connection has been broken.
Original settings with Aspera Connect and uploading to Ci include a speed cap of 20mbps-100mbps, but this can be changed as outlined below in the "How To" section of this article. While a user can change their speed limit settings, it is recommended to try and match what you set the speed limit to what is close to the available bandwidth. If a user sets the speed too high, such as 1gbps and only have a 10mbps upload speed, then Aspera will not necessarily get all of the bandwidth due to the manner in which is tries to attain more speed. If for example, a user has an upload speed of 200mbps, then set the speed limit to something closer to 200mbps.
There are additional Preferences that can be set in Aspera Connect by going to the Preferences window. This can be found by:
- For MacOS: Click the Aspera Connect icon in Dock, see the resulting menu in the top left desktop navigation click on, "Aspera Connect" and in the resulting drop-down, select Preferences.
- For Windows: Right-Click on Aspera Connect icon in the Tray, select the Preferences option.
- For either MacOS/Windows: Open the Transfers Monitor window as outlined below, select the Preferences icon in the lower left part off that window.
Other settings in the Aspera Connect Preferences to consider setting:
- Adjust the amount of concurrent file transfers: Go to the Preferences window, on the General tab, under the Queue section make sure that "Enable queuing" is checked and then modify the "Maximum concurrent transfers" to be what is preferred. There is a maximum of 100 concurrent transfers in Aspera Connect. Please keep in mind by enabling more concurrent transfers this can result in the splitting up of the connection and the speeds will likely divide out for the transfers based on the available bandwidth.
- Adjust the download location: For use when using Aspera Connect for downloading, but good to set after installation. In the Preferences window, under the Transfers tab, there are two options:
- "Save downloaded files to:" This will give the option to identify where files can be downloaded to and not prompt to identify the location. This is the default setting, but changing to where that location would be is up to the user.
- "Always ask me where to save downloaded files": This can be chosen and will cause prompting for file location for each file transfer. This can be helpful is files need to be downloaded to multiple distinct locations/folders. When downloading multiple files, it will prompt for each one. If a selection of multiple files is attempted and they call can go to the same location, this could be set back in the preferences to use the "Save downloaded files to" option so that for multiple files the prompt is not occurring each time.
Various AdBlocker plug-ins may sometimes cause issues with contributing with Aspera. If that is the case, please deactivate or uninstall your adblocker.
Should you have any questions, please reach out to the Ci Customer Success Team by submitting a request here in the Help Center.
Aspera Connect Upload Notes:
— All failed transfers will only be resumed if they were initiated within the last 24 hours;
— The Ci Workspaces User Interface allows upload of files and specifically with Aspera, now allows upload of a Folder with its contents including all files and sub-folders;
— We buffed our Aspera downloading capability by 75%! Now, users can download up to 35,000 files using Aspera folder download.
Aspera Connect Upload: How-To
For a complete reference on File Request content contribution, visit our How To Upload via File Request article. To upload files with Aspera, please ensure you have Aspera Connect plugin installed and running (you can download the plugin from Aspera’s official site: https://www.ibm.com/aspera/connect/.
Once the plugin is running, click on "Upload with Aspera" (see Figure 1 above) (for contribution via File Request, click on “+ File Upload", select the files you want to contribute, click “Open” and then click “Contribute Files”, see Figure 3).
Uploading process will now get started. You can see its progress either in Ci UI or in Aspera Transfers window, which will be opened once transfers get started:
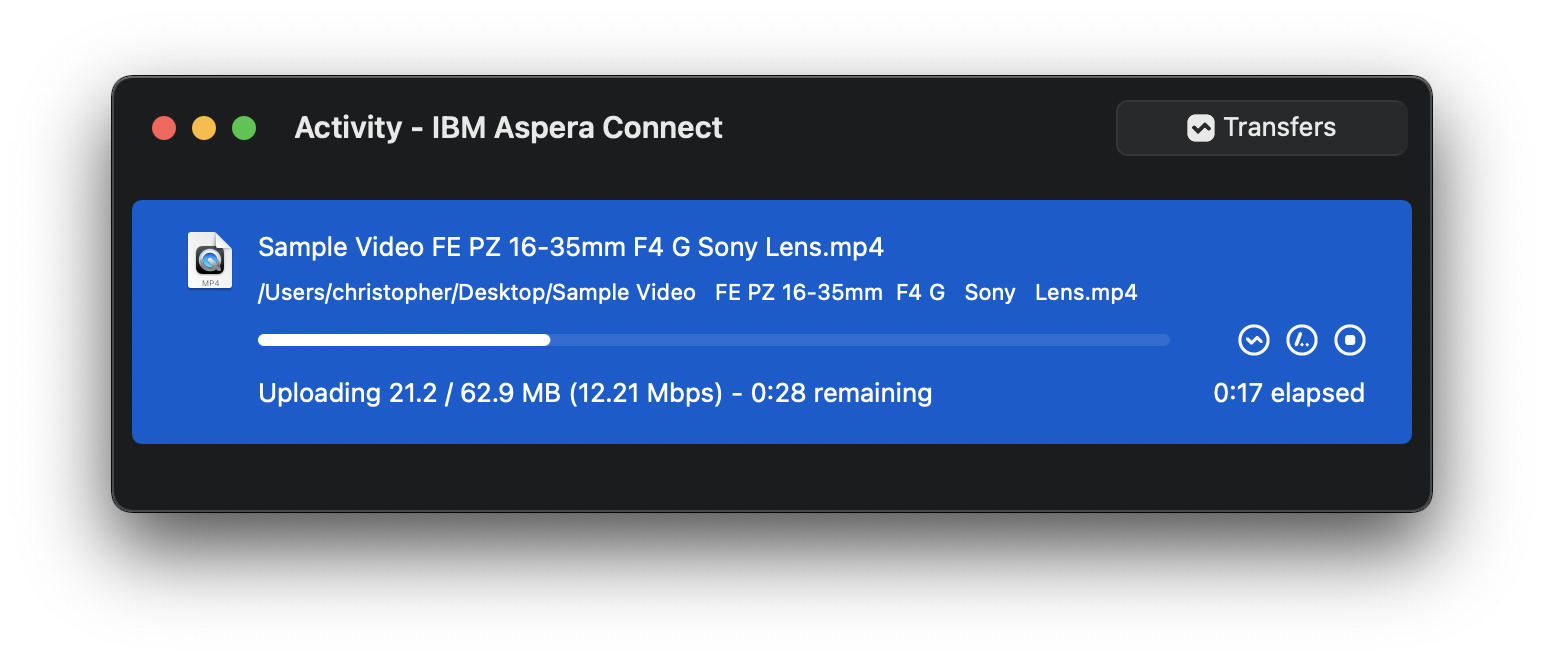
Figure 4: Aspera Connect Transfers Window
IMPORTANT: The default setting for Aspera transfer speed is 20 Mbps - 100 Mbps. To utilize the maximum of available bandwidth, for each file transfer (default setting is 3 concurrent transfers) please click on the heartbeat icon next to the uploading progress bar (see Figure 4). This will open the Transfer Monitor window.
Set the speed by adjusting the arrow pointer on the left-hand side (given that you have the available bandwidth to take advantage of).
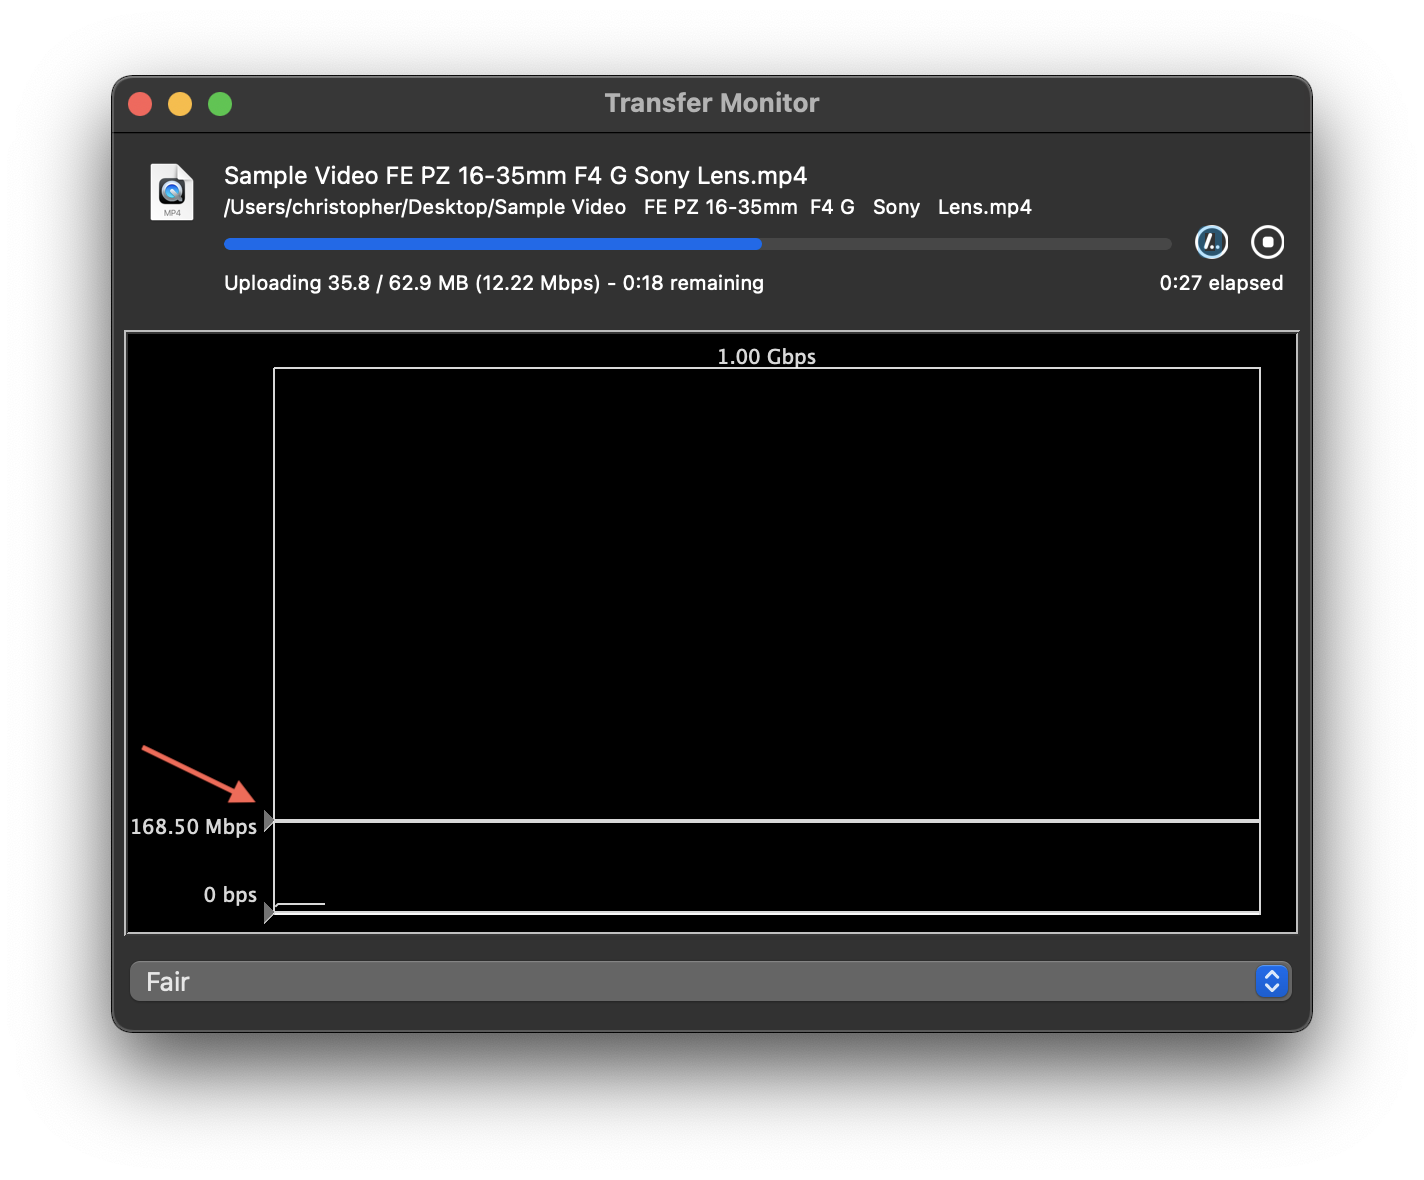
Figure 5. Aspera Connect Transfer Monitor Window
For any additional questions, please reach out to the Ci Customer Success Team by submitting a request here in the Help Center.